Capturing Email Attachments with Apache Airflow
In the world of property insurance you have to extract information from TPAs and MGAs that share data in the form of emailed bordereaux data files. Automating this process can be a pain, so in this example we're going to show you how to use Airflow to watch a mailbox and capture specific types of files (here, bordereaux csv files) and save them locally for later processing.

After reading this guide, you’ll be able to:
- Automatically fetch all new attachments from your Gmail account on a schedule
- Save every file into a shared downloads folder ready for any analytics tool
- Maintain a precise audit trail of which attachments were retrieved and when
- Seamlessly integrate incoming files into your BI or data pipeline with just a few lines of Python
- Streamline your workflow so your first task each day is insight, not inbox maintenance
Next, you'll deploy Apache Airflow inside Docker on Windows and configure a simple Python workflow that logs into your inbox, retrieves unread attachments, and marks them as processed, reliable, and ready for whatever comes next.
Why Manual Hunting Fails
Numerous industries generate files for various reasons. If you work in insurance that is likely to include loss reporting, reinsurance accounting, compliance standards, and sales metrics. Yet the process often relies on manual triage:
- Daily volume. Carriers flood your inbox each day with new emails, many of which have critical, time sensitive attachments.
- Inconsistent subjects. Filenames vary by carrier; one might send BORD_Q1_2025.xlsx, another LossReport.zip.
- No audit trail. Email clients record only the delivery; analysts cannot prove when a file was accessed.
Every missed attachment interrupts your workflow: dashboards stall awaiting data, reports get delayed, and confidence in your workflow begins to erode. Automation that works every time gives you back that mental headroom, letting you focus on insights instead of inbox management.
Solutions Overview
Below is a high-level overview of how all the pieces fit together. Don’t worry if some of these terms are unfamiliar, you’ll see exactly how each part works in the steps to come.
- Docker Desktop + WSL 2 – Provides a Linux-compatible host on Windows
- Airflow Webserver – The central UI and REST API for monitoring flows
- Airflow Scheduler – Queues and triggers your DAG runs on schedule
- Airflow Worker – Executes the Python task that retrieves attachments
- Postgres + Redis – Houses Airflow's metadata and task queue
Each new attachment lands in your shared downloads/ folder, readily available to Power BI, Excel, or any analytics tool. Once this pipeline is live, you can extend it with just a few lines of code to parse, validate, and load data into your database.
Prerequisites
Before you begin, ensure:
- Docker Desktop is installed on Windows 10/11. If it's not installed yet, follow the official guide at https://docs.docker.com/desktop/setup/install/windows-install/
- Gmail account with IMAP enabled and a 16-character app password generated (Google Account → Search Google Account → "App Passwords"). Store this somewhere safe.
- PowerShell or your preferred command-line interface for navigation and Docker commands.
With these in place, you are much closer to automation.
Step 1: Prepare your workspace
1. Open PowerShell (or your shell of choice).
2. Create a new project folder and enter it:
mkdir C:\Users\YourUserName\airflow-email
cd C:\Users\YourUserName\airflow-email
3. Create subfolders for configuration, code, and logs:
mkdir config
mkdir dags
mkdir downloads
mkdir logs
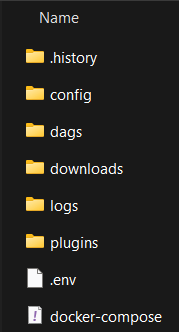
4. Open your editor (e.g., VS Code) and create the following files:
• config\docker-compose.yaml
• dags\gmail_attachment_retrieval.py
• .env (in the root directory you just created)
5. In Windows explorer or your code editor you should see something similar to this:
Step 2: Configure credentials
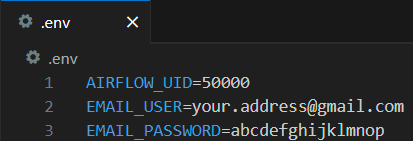
Open .env in your editor and add your Gmail address and the 16-digit app password you created, and AIRFLOW_UID=50000
AIRFLOW_UID=50000
EMAIL_USER=your.address@gmail.com
EMAIL_PASSWORD=abcdefghijklmnop- Fast iteration. The dotenv library loads these values at runtime.
- Security caveat! Keep this file local. In a shared or production environment move these values into an Airflow Connection (Admin → Connections) or a Secrets Backend.
Step 3: Launch the Airflow stack
1. In PowerShell, run:
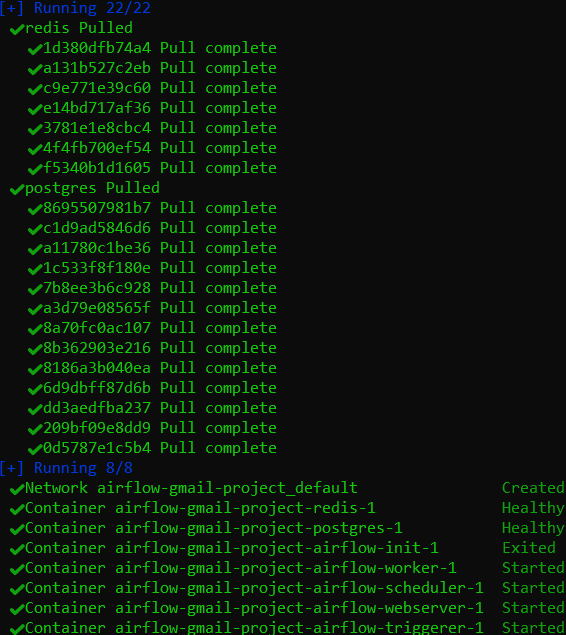
docker compose up --build
2. After you see airflow-webserver and airflow-scheduler logs indicating readiness, stop streaming with Ctrl+C.
3. Relaunch in detached mode by using the following command:
docker compose up -d
Note: The first execution downloads ~2 GB of images
Your Airflow environment is now running locally.
Note: As part of startup the Docker Compose file runs an 'airflow-init' service that:
- Initializes the Airflow metadata database ('airflow db init')
- Creates your Admin user - By default, that command is:
    airflow users create \
    --username airflow --password airflow \
    --firstname Air --lastname Flow \
    --role Admin --email admin@example.com
If you'd like a different user id or password, edit the 'airflow-init' block in `config/docker-compose.yaml` before running the stack.
Step 4: Access the Airflow UI
Navigate to http://localhost:8081.
Login credentials (created by airflow-init):
Username: airflow
Password: airflow
Toggle the gmail_attachment_retrieval DAG from Off to On; do not trigger yet.

Step 5: Key code walkthrough
Open dags/gmail_attachment_retrieval.py in your editor. Below are a handful of lines that power the DAG -- you'll find the full DAG file in "Full Code Listings" later.
1. Load your credentials and connect to Gmail.
# Create the DAG
  dag = DAG(
      'gmail_attachment_retrieval',
      default_args=default_args,
      description='A DAG to retrieve attachments from Gmail using IMAP',
      schedule_interval='@daily',
      catchup=False,
  )

  def fetch_gmail_attachments(**kwargs):
      """
      Fetch attachments from emails in Gmail using IMAP
      """
      imap_host = 'imap.gmail.com'
      imap_port = 993
      email_user = os.getenv('EMAIL_USER')
      email_password = os.getenv('EMAIL_PASSWORD')

      download_dir = '/opt/airflow/downloads/'
      Path(download_dir).mkdir(parents=True, exist_ok=True)

      print(f"Connecting to Gmail IMAP server for account: {email_user}")
      mail = imaplib.IMAP4_SSL(imap_host, imap_port)

      try:
          mail.login(email_user, email_password)
          print("Successfully logged in to Gmail")

          mail.select('inbox')
          print("Selected inbox")
This block opens a secure connection to Gmail's IMAP server using your credentials from .env, then selects the Inbox folder. If the login or folder select fails, the DAG will stop here and report the issue in the log.
2. Search for unread messages.
# --- add UNSEEN so only unread mails are returned
date_since = (datetime.now() - timedelta(days=7)).strftime("%d-%b-%Y")
search_criteria = f'(UNSEEN SINCE "{date_since}")'
print(f"Searching for emails with criteria: {search_criteria}")

status, email_ids = mail.search(None, search_criteria)
email_id_list = email_ids[0].split()

if not email_id_list:
    print("No emails found matching the criteria.")
    return

print(f"Found {len(email_id_list)} emails matching the criteria.")
Unseen ensures only messages you haven't processed come back. The 'if not' guard cleanly exits the task when there's nothing new. Finally, the 'print' confirms how many emails you'll download in the next step.
3. Download and save attachments.
for email_id in email_id_list:
status, msg_data = mail.fetch(email_id, '(RFC822)')
msg = email.message_from_bytes(msg_data[0][1])

subject = msg.get('subject', 'No Subject')
sender = msg.get('from', 'Unknown Sender')
print(f"Processing email from {sender} with subject: {subject}")

if msg.get_content_maintype() == 'multipart':
    for part in msg.walk():
        if part.get_content_disposition() == 'attachment':
            filename = part.get_filename()
            if filename:
                timestamp = datetime.now().strftime("%Y%m%d%H%M%S")
                safe_filename = f"{timestamp}_{filename}"
                filepath = os.path.join(download_dir, safe_filename)

                print(f"Saving attachment: {filename} as {safe_filename}")
                with open(filepath, 'wb') as f:
                    f.write(part.get_payload(decode=True))
                print(f"Attachment saved to: {filepath}")
This loop walks through each part of every unread message, finds attachments, and writes them into your downloads/ folder with a timestamped name so nothing is overwritten.
4. Mark messages as read.
# --- mark this message as read so it won't be fetched again
mail.store(email_id, '+FLAGS', '\\Seen')
Marking each message \Seen ensures it won't be matched by UNSEEN the next time the DAG is executed.
Step 6: Trigger & validate
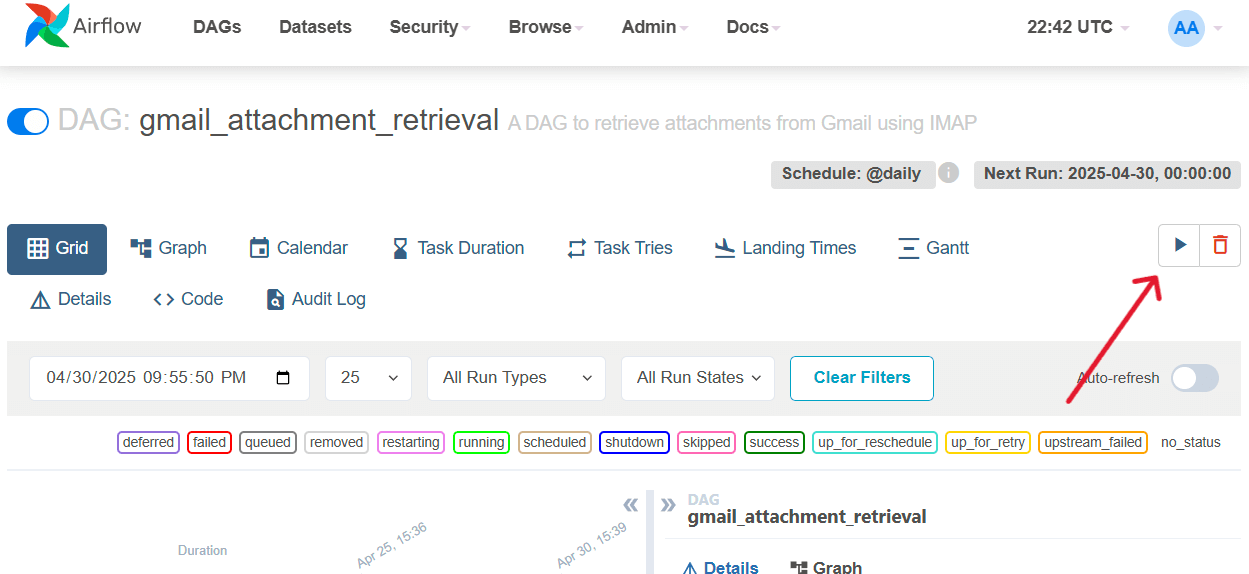
Back in the Airflow UI, the gmail_attachment_retrieval switch should be set to On already. If not, do so now.
1. Near the upper right, click the Trigger DAG button (►)
2. Observe the DAG's grid square turn from queued to running to green indicating success.
3. In Windows Explorer if you open your downloads folder under the root directory of the project folder, you should see new files appear with timestamped names of any email attachments that were in your inbox.
Real-world edge cases
There are a few edge cases I'll point out that may trip you up in practice:
- Variable subject lines. Senders may often change filenames or email subjects unexpectedly. If your search returns too few or too many messages, adjust or remove the SUBJECT clause in your IMAP query or combine multiple keywords with OR.
- Attachments inside ZIPs. When files arrive zipped, download the .zip first and then add a small Python step (using the zipfile module) to extract its contents into your downloads/ folder.
- Multiple attachments per email. The loop handles each file sequentially, but you may prefer to group them by email—e.g., create a subfolder per message or prefix filenames with the message UID.
- Intermittent IMAP errors. Network blips or Gmail throttling can cause mail.fetch or mail.search to fail. Wrap those calls in try/except with retry logic (for example, three attempts with exponential backoff) and log failures so you can surface persistent issues.
Each case requires only small modifications, preserving the core pipeline.
Extending the pipeline
Once the core DAG runs reliably, you can add tasks for:
- Excel parsing. Use Pandas to read each file and write rows into Postgres.
- Database triggers. Configure Airflow's SqlSensor to kick off when new rows appear.
- TaskFlow API. Refactor to @dag and @task decorators for cleaner orchestration.
- Secrets management. Migrate from .env to AWS Secrets Manager or Vault.
A few lines of code transform this into a full ETL pipeline.
Why Docker on Windows?
For the Windows users out there, you may question the need for Docker; Here are a few good reasons to use Docker on windows:
- Signal handling. Airflow components rely on Unix signals (SIGTERM, SIGQUIT) that Windows cannot emit.
- Multi-container orchestration. A single docker-compose up brings up five coordinated services.
- Consistency. The same YAML file works on any machine or CI runner, eliminating "it works on my laptop" issues.
Docker abstracts OS differences so you focus on business logic.
Conclusion: From Inbox Chores to Insights
By now you've automated daily attachment retrieval, built an audit trail, and freed up minutes each morning. From this foundation you can expand into a full ETL pipeline, so your first task is always analysis, never inbox chores.
Automation pays dividends quickly. By eliminating manual inbox triage, teams can see real time saving each day. Time that can be reclaimed and redirected toward exception handling, data validation, and strategic insights.
Appendix - Full Code Files
Rather than embedding every line of YAML and Python directly into this article, I've provided the contents of each file for you to copy and paste.
- config/docker-compose.yaml - Place this file into your config/ folder.
- dags/gmail_attachment_retrieval.py - Place this file into your dags/ folder.
Once those files are in place, you can follow the steps in this guide to launch Airflow and retrieve email attachments.
Next in Series
Building a Property Insurance Claims Data Lakehouse with Airflow and Databricks
In this article we build a data lakehouse for property insurance claims management. This allows us to build out a complete claims analysis platform complete with standardized data modeling.
Read next article in series